A few months went by. I worked on the software and a control interface with one goal: make the experience smoother. At the same time, I explored ideas for the next prototype.
Leveling Up
The first prototype worked, my son loved it, and my sister wanted one for her kids. But a hand-glued wooden box with a Raspberry Pi sitting inside was not exactly practical.
Diving into 3D Modeling
I had dabbled in Blender years ago. It was time to dust off those skills. At that point, I had no real idea what I was getting into, no actual strategy, and it marked the beginning of a cycle I would repeat several times: learn, try, get lost, refocus.
For this first design, I went big. I imagined 3D-printed supports to hold all the sensors and components I wanted to use, with wooden panels fixed on top to form the outer shell. It was bulky.
Lots of components: LEDs, sensors, and a turntable on top. The idea was to make it work like a record player, with wooden discs carrying an NFC sticker underneath and embedded magnets to align the disc, then spin it with a small motor when the NFC reader detected it. The upside was flexibility: I could simply place a figurine on top (I already had a few Faba figurines around), a Yoto-style NFC card, or even plain cards bought on Amazon.
I bought wooden discs online and drilled them after 3D-printing a jig to position the magnets. The magnets kept the disc in place and made it spin via an internal rotating plate, also magnetized, driven by a motor.
It sounded appealing on paper. The project was still just a hobby and, if I'm honest, I was following whatever idea felt exciting at the time, without a clear direction.
Blender is great software for animation and rendering, but for modeling technical objects with precise dimensions and mechanical constraints, it is a struggle.
Assembling the Components
Alongside the modeling work, I tackled another challenge: bringing together all the electronic components I wanted to integrate into the Music Box. NFC reader, audio amplifier, speakers, sensors... all wired up on a breadboard to test everything together.

A beautiful mess of wires and ribbons, but it allowed me to validate that all components could work together before moving to something cleaner.
I then set out to build a circuit board to replace the breadboard and connect everything more cleanly. For that, I designed my first board on EasyEDA.
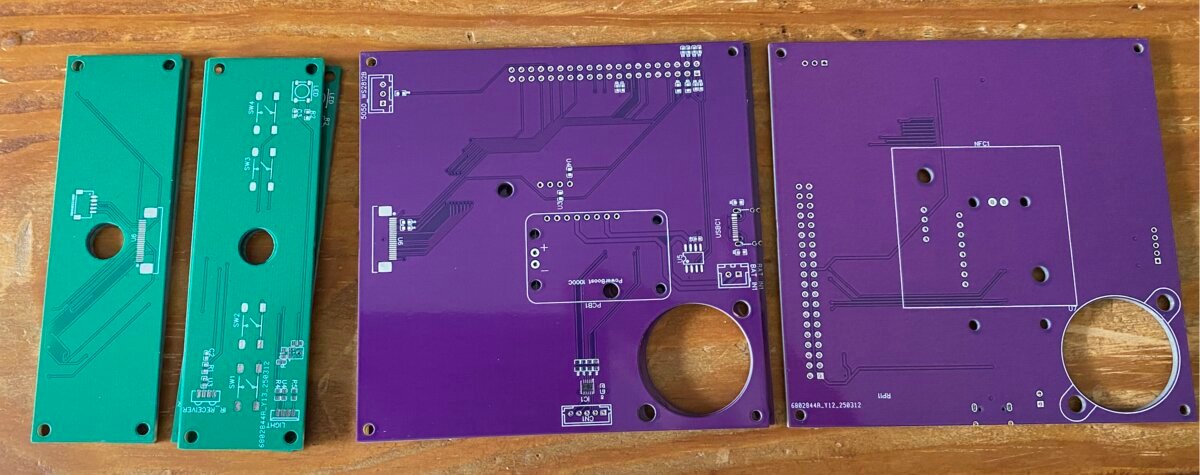
I was pretty happy with the result. I even added a ring LED to create animations around the disc.

Technical Headaches
In the meantime, I ran into problems in several places. The Adafruit audio HAT did not always have drivers that matched the current version of Raspberry Pi OS. Every update meant checking everything again, tweaking things, sometimes even going back to an older version to make it work again.
The PN532 gave me trouble too. Its range varied depending on the antenna, the distance, and the interference from nearby components. I spent evenings adjusting the reader's orientation and the gap between the NFC card and the antenna to get reliable reads.
It took time, but it taught me how to debug very low-level hardware problems.
Stepping Back to Think
The custom PCB worked, more or less. But at some point I started wondering if I was going down the wrong path. All this complexity in the modeling, the growing pile of components, a case that was going to be heavy and hard to assemble... I took a different direction: simplification.
I had just discovered Shapr3D, a 3D modeling tool much better suited to this kind of work. I decided to start the modeling from scratch: a 3D-printed structure designed like the edges of a cube, made to hold laser-cut panels.


That gave me a functional enclosure, with buttons to navigate through songs. The software had evolved too: I could now manage a playlist per NFC tag instead of just a single track.
What I Learned
The turntable, the custom PCB, the wooden discs: none of it ended up in this prototype. But each of those explorations taught me something. Blender introduced me to 3D. EasyEDA introduced me to circuit design. The magnets and the motor confronted me with the constraints of the physical world.
These detours let me explore different areas and understand each of them better.
I now had a working prototype, a better understanding of 3D modeling and electronics, and the drive to keep going. It was time to evolve the prototype again and fix the problems I had run into.