Let me introduce the third prototype of The Open Music Box: an NFC-driven audio player for children, and above all, a complete, open source system that anyone can reproduce from a Raspberry Pi.
But before opening the box, a word about the road so far. In the previous article, I introduced the second prototype and its big new feature, playlists, which my son loved browsing with the two front-face buttons. One point still needed improvement: the case was too compact to fit a battery. Always plugged into the wall, and a one-to-two-minute wait at every restart. The v3 continues this steady improvement: a finished version, ready to replace the old one, and this time, to be shared.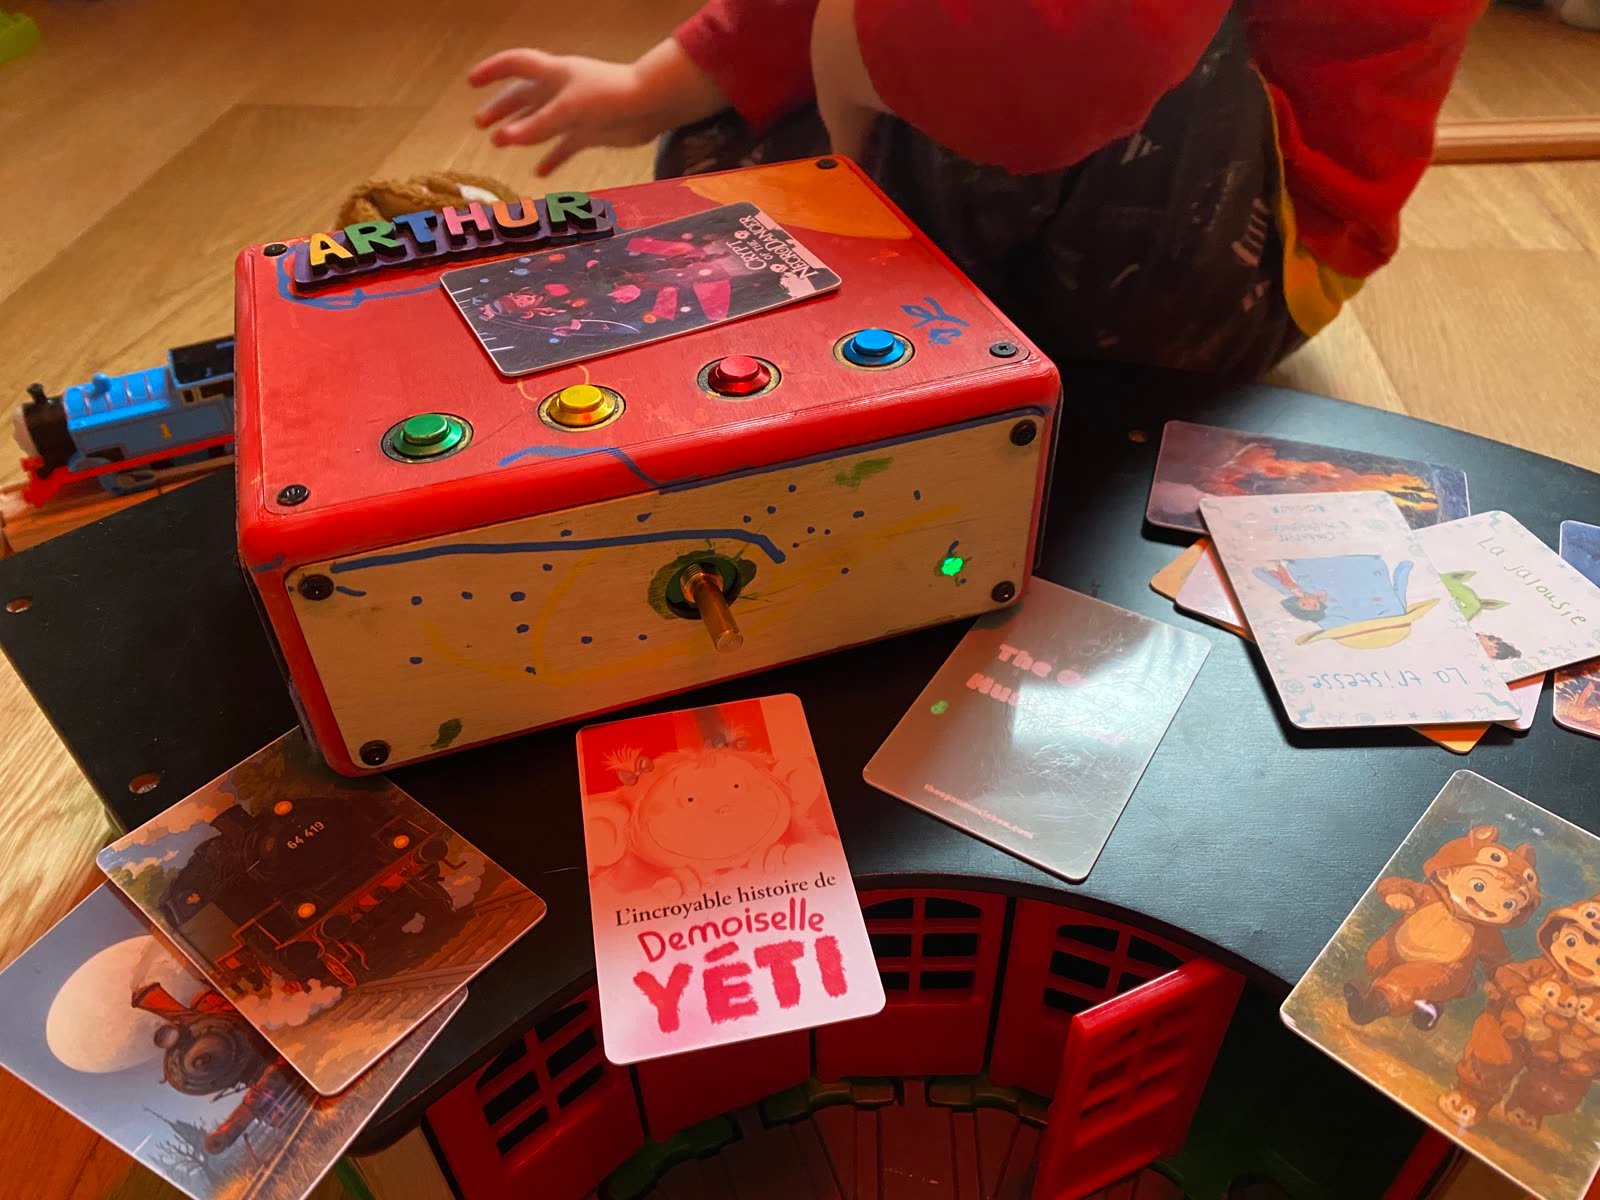
A web interface to manage the content
On the v2, adding a story meant connecting over SSH, dropping MP3 files into the right folder, running a script to bind cards to the new playlists, then restarting the service. Not really compatible with family use...
So I built a web interface served directly from the Raspberry Pi. From any phone or computer on the same network, you can create playlists, upload audio files, and bind an NFC card to a playlist. No terminal, no file handling.

Everything you need to do can be done from this screen. The box immediately reflects what changes on the phone side, and vice versa.

Upload is done by drag-and-drop, file by file, with a progress bar.
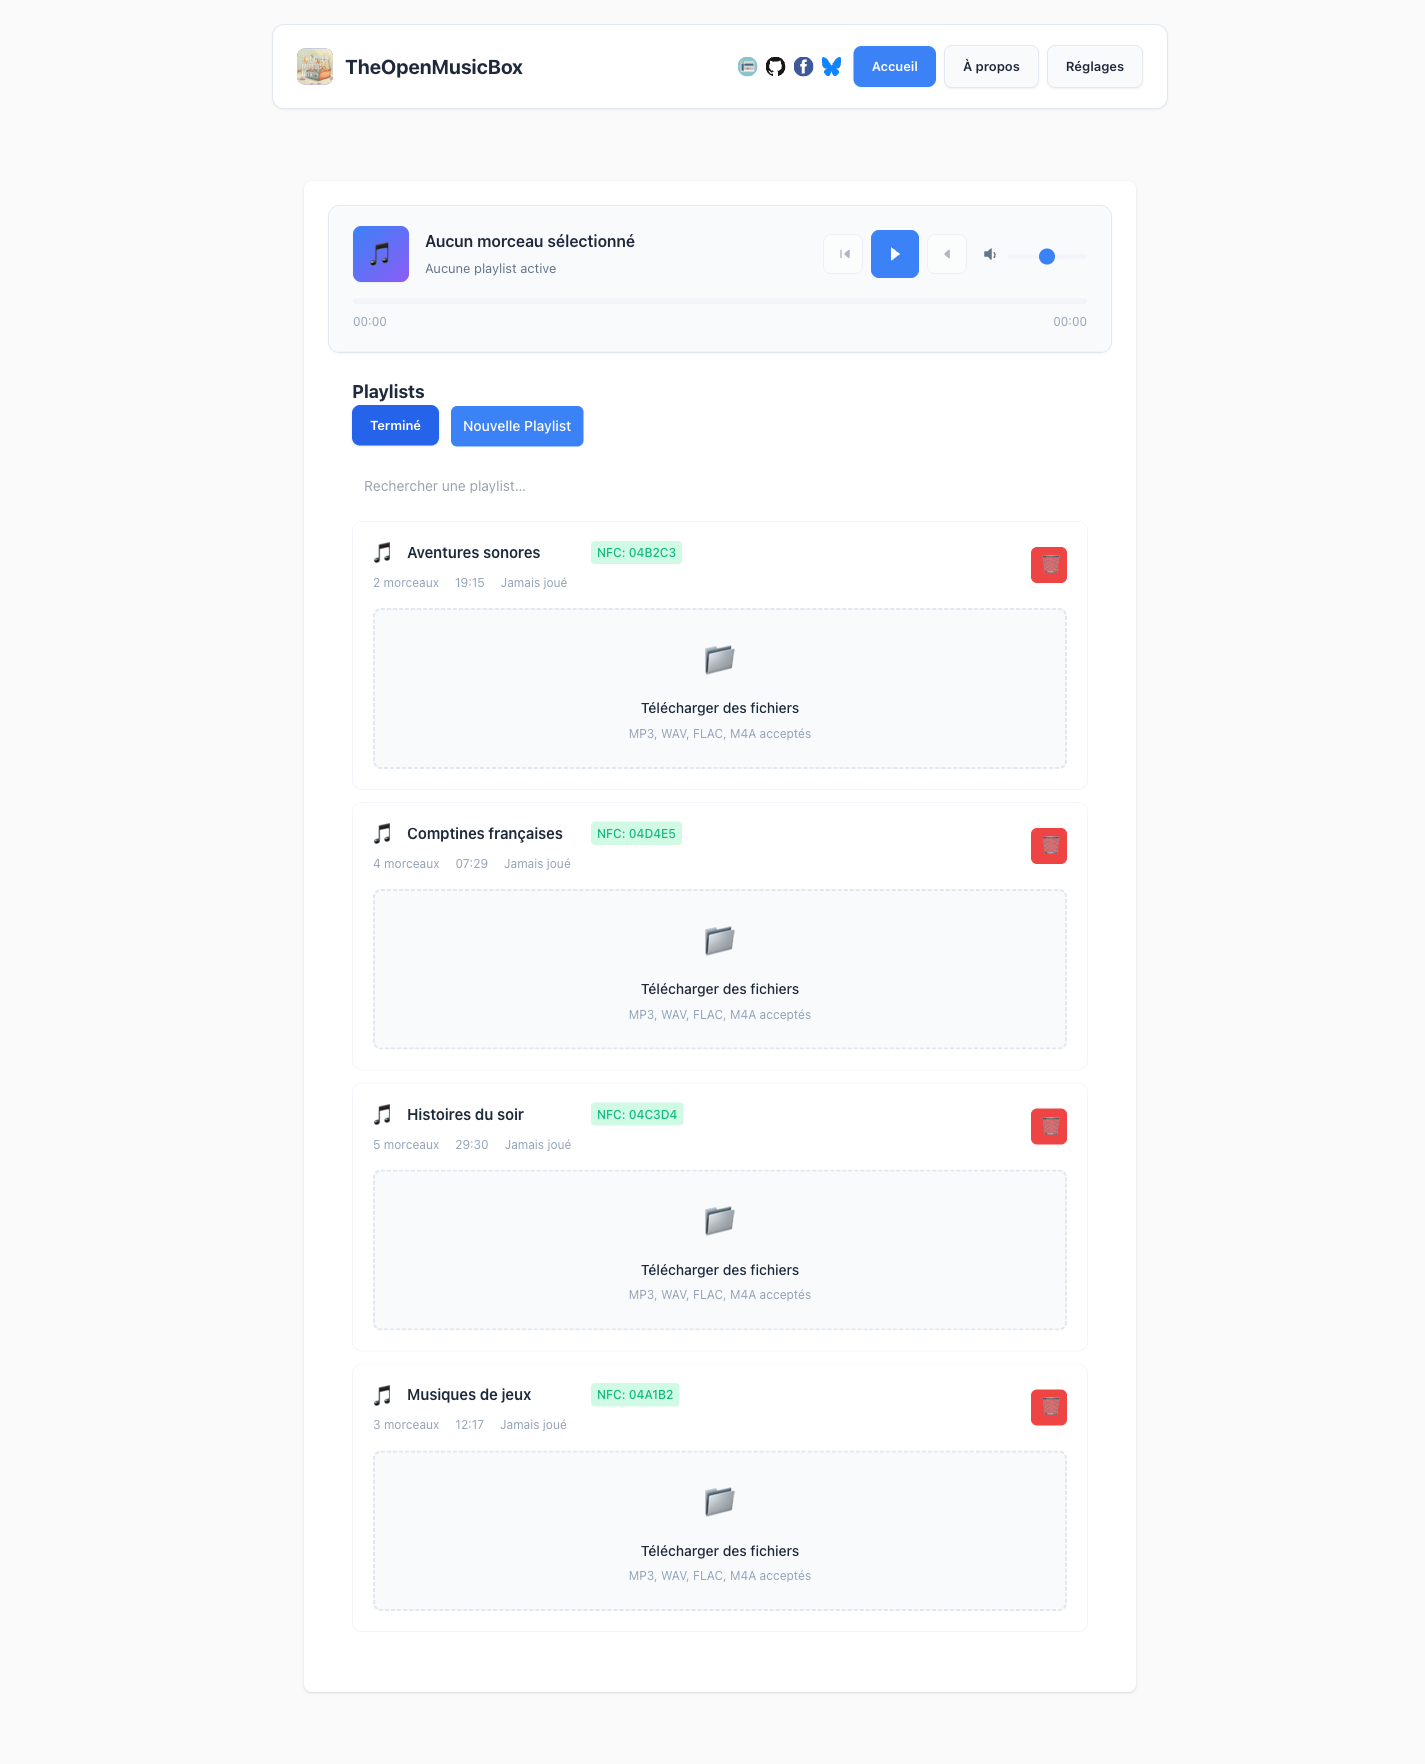
Binding an NFC tag follows the same logic: you start the binding mode from the interface, present the card to the reader, and it's linked to the playlist. No more manual handling of identifiers.

A battery to make it portable
On the hardware side, the main task of the v3 was to finally fit a battery into the case, to stop depending on the wall socket. So I redesigned the enclosure starting from the battery: size it first, then organize everything else around it.
Inside, a LiPo battery is connected to a small board that charges over USB and switches to standalone mode when unplugged. On paper, that solved the problem: no more leash, no more restart wait.
Except, in practice, the switch between USB power and battery causes a brief power cut, which makes the Raspberry Pi restart. The result: we gained mobility, but the one-to-two-minute delay is still there.
Not a disaster, you work around it, but it's rather frustrating. I tried adding capacitors to smooth out the current, but I'm not an electronics engineer, and this problem persists to this day.
Buttons for interactive stories
While designing the v3, I was starting to think about interactive stories: an audio narrative where the child chooses what happens next by pressing a button. For that, two front-face buttons were no longer enough, I needed four, for maximum interactivity.
So I placed these four colored buttons on top of the case. It also brings better ergonomics along the way: pressing on top is more pleasant for interaction, and it avoids pushing the box when you press on it.
The interactive story format is still a work in progress, but the case is already designed to host them the day it's ready.
Building the case
The final case keeps the same logic as the v2: a 3D-printed structure designed as the frame of a cube, with laser-cut MDF panels for the faces. What changes: the dimensions, the openings for the new buttons on top, battery access from the bottom without a full teardown, and a refined structure.
To successfully print this cubic structure in a single piece, it took quite a bit of calibration. The challenge was the long bridges from one wall to another: they had to lay down cleanly without sagging, and the supports had to come off afterwards without leaving marks.
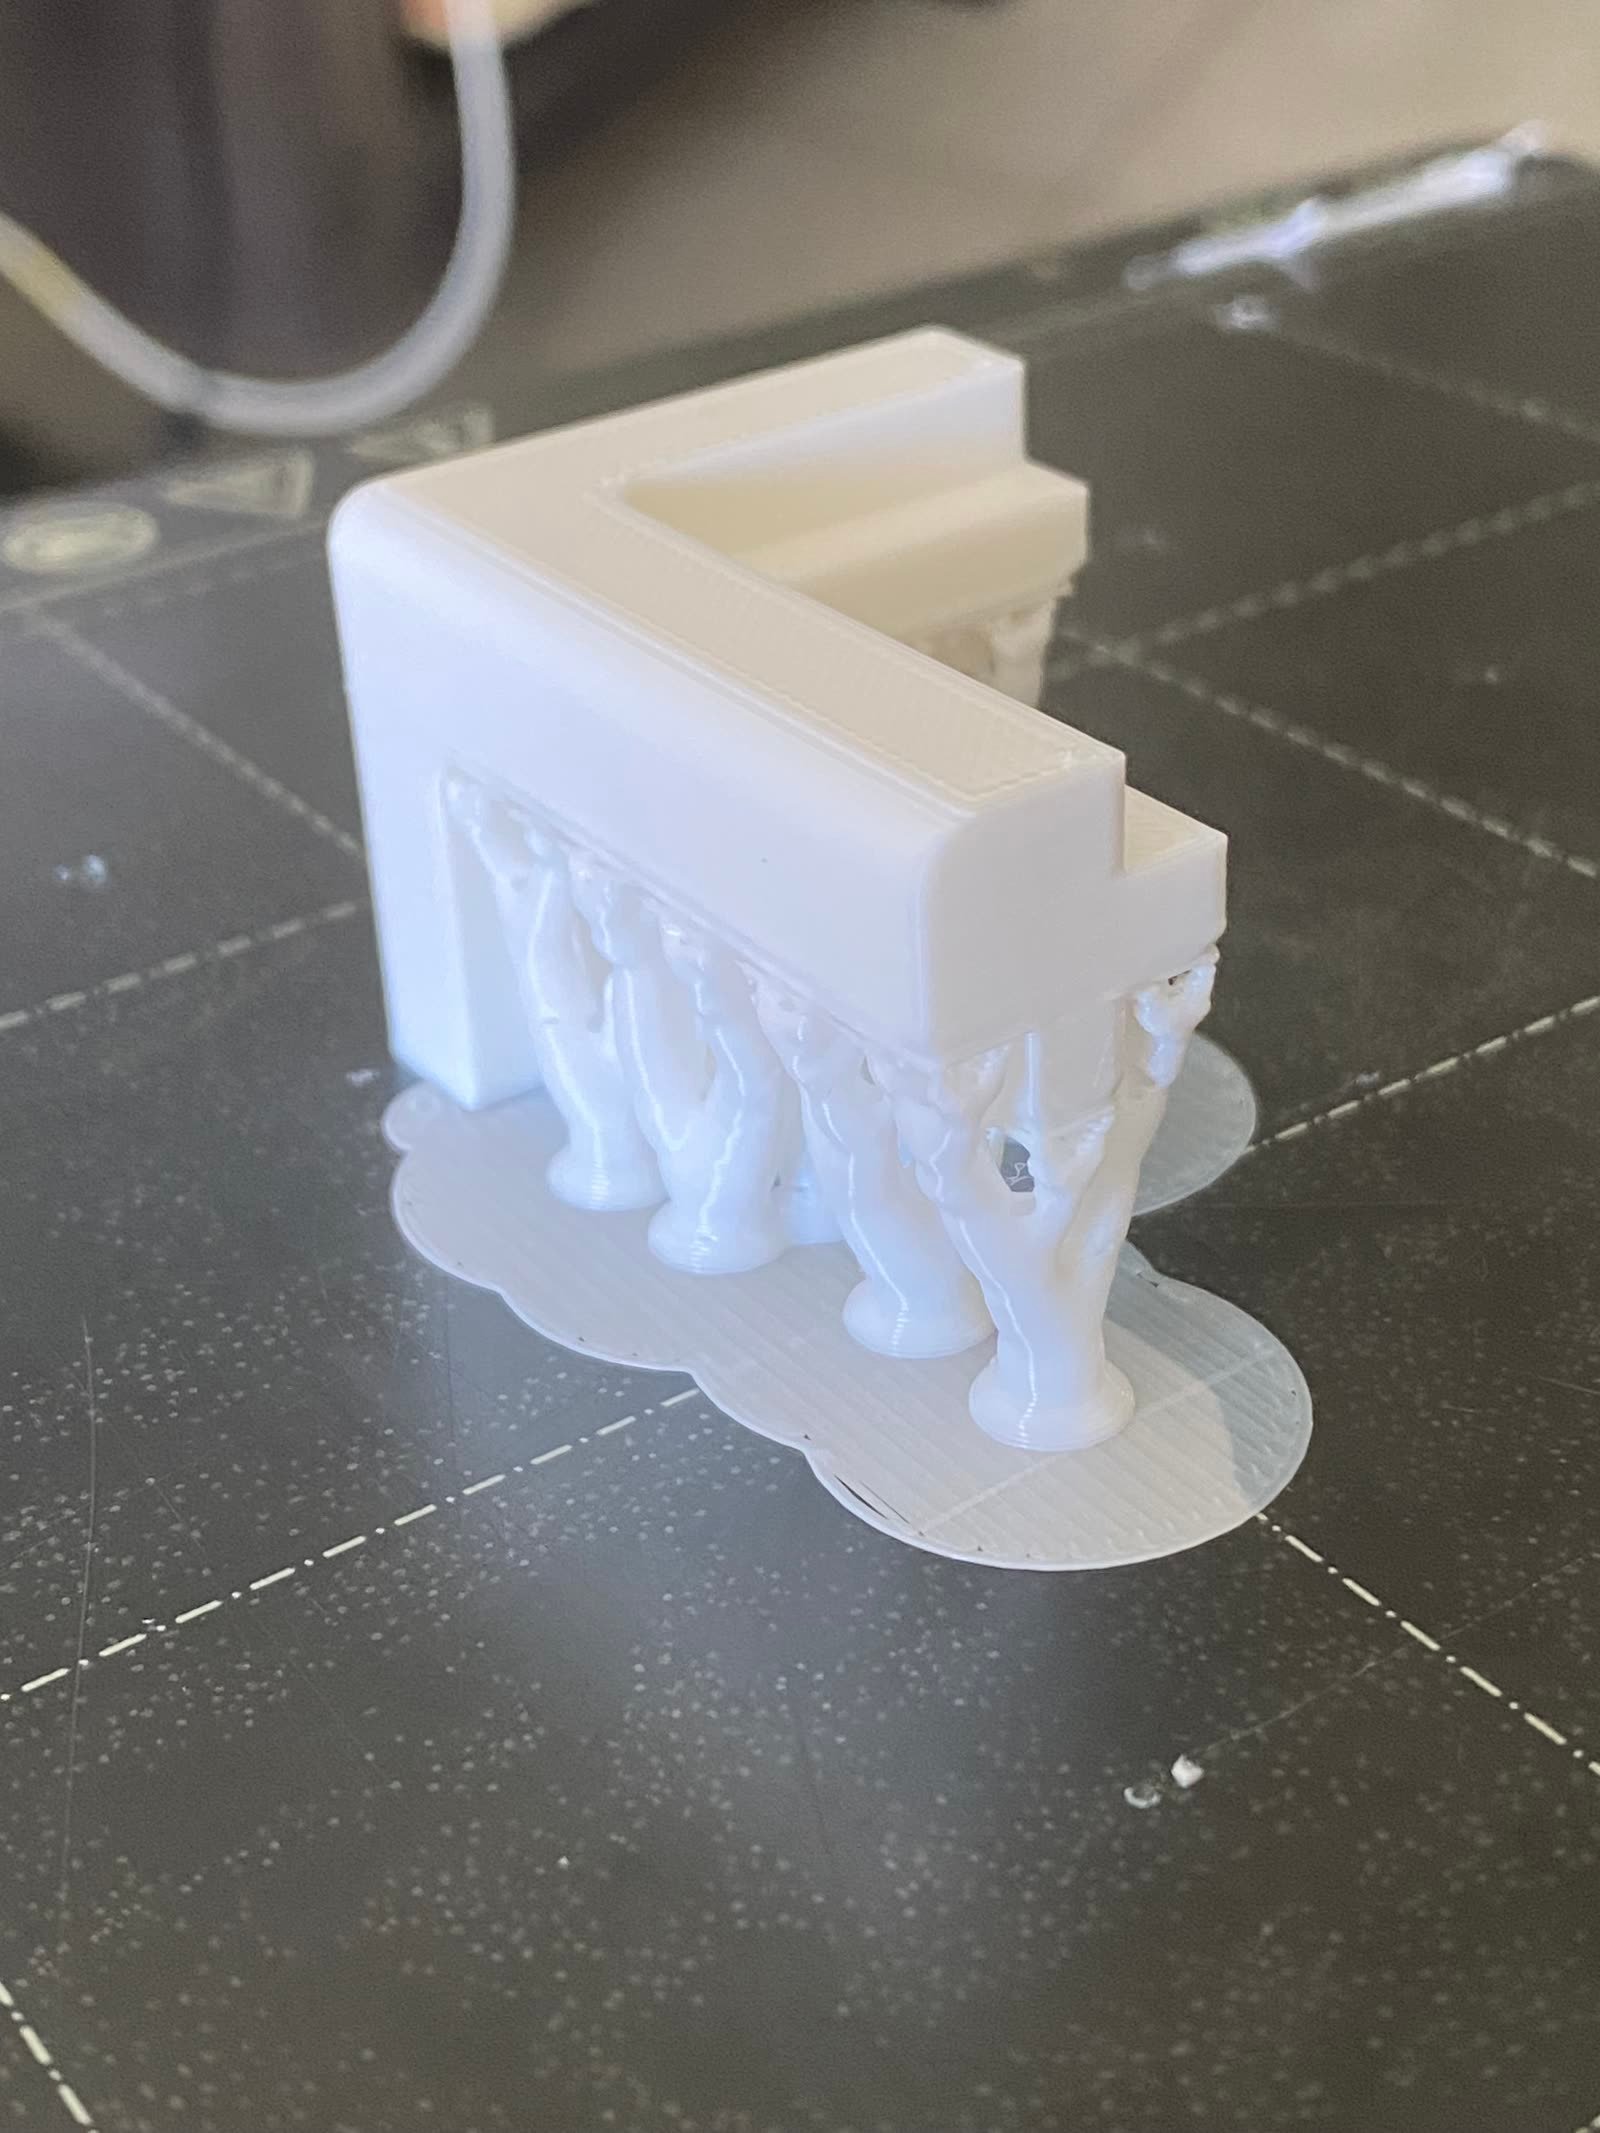
Many sacrificed prints before reaching a clean result.

Once the structure was printed, the other exercise remained: making the dimensions match between the internal plates that hold the components, the printed parts, and the laser-cut wooden panels. Three manufacturing techniques, three different levels of precision, to align. I came out of it having learned a lot about calibrating a 3D printer and about the settings that really influence the final quality.
Reproducing the system
Prototype 3 works, it runs every day at home. One last step remained for it to truly become a project: making it reproducible.
For now, it's mainly the application that is available: the code is working on GitHub, and a configuration script automatically prepares the Raspberry Pi, from installing the dependencies to launching the service. Non-commercial license, free for personal, educational, and modification use.
As for the case, the STL files and the BOM are still being finalized. I'd rather publish them once they're truly ready to be followed. It's coming, and I answer questions raised in an issue.
What comes next
This Raspberry Pi version is an arrival point, but also a turning point. In daily use, it's expensive, draws a lot of power, boots slowly, and needs a full operating system for what is, deep down, an audio player driven by NFC. That's too much for what it does. I've spent a lot (too much) of time on this proof of concept, and it's time to turn the page toward more fitting components.
That's why the Raspberry Pi repo is marked as deprecated on GitHub: what comes next takes all my energy right now, and I'll present it in the next article.
That said, this version remains open source, available, and usable for anyone who wants to take it on. The code is there, working. The case files will follow. If you build your own, let me know.